Whether you are an experienced astrophotographer or just happen to have a camera handy, you can obtain interesting and beautiful photographic memories of a total solar eclipse. The key is to be prepared and to have a basic plan. This reference is intended to help you prepare and plan to photograph an eclipse while enjoying the experience at the same time.
You will hear some eclipse veterans declare that you should not bother to photograph an eclipse. For some that advice works. Sit back and enjoy the visual show - there is a lot to see and experience. Wasting time with a camera will detract from the splendor. However, photographing a solar eclipse is both thrilling and exhilarating. Photographing the eclipse successfully provides a tangible memory that will never fail to bring a chill or a tingle. Even a simple camera will produce a picture that captures the moment.
Obtaining a "perfect" picture of a total solar eclipse is not easy. Pictures that show the corona detail with prominences are the result of multiple images stacked together along with other computer/dark room work. Prominences are several orders of magnitude brighter than the corona. They will be over exposed in any image showing coronal streamers. And the corona will all but vanish in pictures showing prominences in detail. To produce a good composite picture that you can call your own is not too difficult, if you have the right equipment and are able to get a good sequence of images at varying exposures.
Total Solar eclipses are not your everyday type of thing to photograph. Preparation is essential to success and learning how others have done it before is the first step. The next and most important step is practice.
A critical consideration when preparing to photograph a total solar eclipse is that travel will be involved (unless you are very lucky and an eclipse will take place over your observatory where the weather is perfect). Getting your equipment to and from an eclipse can be a challenge. My own experience traveling to eclipses plays a key role in my recommendations and comments.
This web page is based on the input of expert eclipse photographers and my own experience photographing over a dozen unique total solar eclipses using a variety of equipment on different platforms. Mobility, transportability, and multiple use are key elements in my decisions of what to take and what to leave behind.
There are people reading this information with a lot more knowledge than I have, you know who you are. If you have any input you'd like to share, it is VERY welcomed. Articles, pictures, comments, corrections and embellishments will be added as quickly as possible.
Top Ten Rules for Solar Eclipse Photography
1: A total solar eclipse is something that only the eye can behold.
This is why most first time eclipse chasers are instructed to forget about taking pictures and just sit back and relax. I know my response to that during my first eclipse was - "yeah right". Perhaps it was because I was a teenager, or because I was then, and am today, an avid astro-photographer. Either way, the result was that I plunged into taking eclipse pictures with little to no information on how to even get started. The purpose of this writing is to introduce the eclipse chaser (both novice and experienced) in what I know about taking solar eclipse photographs. You may already know more about this subject than I do, or spot a mistake in my writings; in which case I'd welcome your input for making this information more complete.
2: You can get great pictures with any camera.
There are lots of things to photograph during a total solar eclipse that will help you remember and cherish the event in the future. You do not need an expensive camera nor do you need a telescope or long telephoto lens to capture some fantastic views of the eclipse that will bring chills down your spine and provide a stimulus for never ending stories to share with others.
3: Do not use a flash attachment.
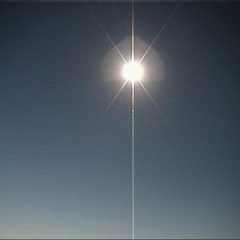
Flashes are intended to light up the forground of a picture. When taking an image of a total solar eclipse the nearest forground object is the moon. The distance to the moon is about 380,000 kilometers and light travels at 300,000 kilometers per second requiring just over two seconds for the round trip. You will have to flash, then wait two seconds to expose the film. Thus the timing simply won't work for your camera if your intent is to light up the darker side of the moon during totality. Plus the number of lumens (brightness) required would blind most people nearby and most likely cause a problem (for you, once they recover and find you). Consequently, flash bulbs and other flash attachments are highly discouraged during totality. They will not be needed during the other phases of the eclipse because the sun will still be bright.
4: Remove your filter during totality.
During totality you must remove the solar filter in order to get something on your film. From the time you can first look at the total phase (2nd contact) until the final diamond ring (3rd contact) you do not need the solar filter. Now this may sound trite for veteran astrophotographers, but it goes hand in had with a simple notion. Try not to panic! The solar eclipse is awesome to behold and as a result one will sometimes go into a frenzy. This is not good - especially if you are attempting to operate more than one device during the eclipse. So something to memorize as a basic rule is to remember to remove your filter. Hey, maybe even look through the eyepiece and refocus too! If this happens to you, don't worry, you got eclipse fever!
5: Planning and Timing are important.
A common problem encountered by eclipse photographers is to either forget to look or miss a great photo opportunity. Due to the relatively short time in which you have to photograph the eclipse it is not uncommon to lose track. This time dilation and shrinkage is a natural human response to the spectacle. Before the eclipse everything seems to move in slow motion as you await totality. I have heard of photographers use up complete rolls of film between 1st contact and 2nd contact and then not have any loaded for totality itself! You should try to plan ahead and then have some way to keep track of your timing. One of the best ways to accomplish the timing aspects is to pre-record your timing using a tape player. And like flash cameras, don't disturb others. Play the audible so that only you hear it or use an ear piece.
6: Don't forget to look!
Develop a plan ahead of time and discuss it with other eclipse photographers. Most may tell you that you need to budget some time to just look at the eclipse. It is amazing to see. I know of several eclipse chasers who have missed seeing the eclipse because they were too busy taking pictures. Instead you should try to focus you attention to view the eclipse - look for streamers, polar brushes, helmut structures, prominences, and so forth.
7: Good eclipse photographs require practice.
Using a telescope or telephoto lens requires some practice. While the total eclipse is taking place is not the time to learn about the features of your equipment. Practice by taking pictures of the moon. Lunar photography is both rewarding and challenging. Plus the practice will allow you to check out your gear before learning about a missing component while half a world away from home.
8. Charge your batteries the night before.
Finding out that the power will run out is a problem with digital cameras and video systems. Make sure you top off your batteries the night before and have a spare available as a back up if possible. Once first contact takes place you have about an hour before totality. It is easy to exhaust the first battery going into totality as time will seem magically slowed due to the high anticipation anxiety.
9. If something breaks don't waste time fixing it.
The timing of a total solar eclipse is so tight that if you experience a malfunction just sit back and enjoy the show. Then plan to go to another eclipse and try again. You don't want to waste the few minutes/seconds of totality trying to repair a piece of equipment, no matter how simple the repair may seem. Simple tasks will seem complicated in most cases.
10. Manual settings are superior to automatic.
With the exception of a wide angle view of the landscape, sky, and total eclipse; automatic focus and exposures might not produce good results for a total solar eclipse. The amount of light is not enough for some automatic cameras. As you zoom in the focus will go in and out. The best results are often obtained with manual settings. Even when using a computer to control the camera you will want to focus manually.
Using a Basic Camera
A Basic Camera is one that you would use to take a picture of some friends at a picnic. A camera-phone, "instamatic", or tablet computer qualify as a basic camera. These types of cameras are largely automatic. You point the camera at what you want a picture of, and capture the image. Pretty simple! Problem is, a total solar eclipse is hardly something simple to image.
Caution
You do not need a flash attachment on the camera. If you do have one, simply tape over the flash with black electric tape in such a manner so as no light escapes when you take a picture. Using a normal camera you can capture the memories of the day by taking pictures of people with their telescopes and cameras, eclipse shadows, and celebrating eclipse chasers.
Please remember that flash photography is absurd and unwelcome during totality!
It is absurd because of what you are trying to light up with the flash. Are you trying to light up the face of the moon? If so, you will need a much more powerful flash! And beside, the reflected light of the earth is already lighting it up (see Earthshine in the longer focal length information under Camera Setups).
It is unwelcome because everyone else would like to see the eclipse and the last thing they want is to be blinded by a flash camera. Although no fatalities have ever occurred due to the use of a flash camera during totality, there have been reports of some damaged cameras and very brutal threats. One of the basic rules is - don't use a flash camera during totality.
Totality lasts only a few minutes, but hours are spent in preparation. And as totality approaches, the sky and surroundings take on very surreal aspects. This is the best time for a basic camera to be busy capturing your friends and fellow eclipse chasers setting up equipment, getting excited as it nears, strange looking high contrast shadows, pinhole camera effects, the horizon colors, and more.
After totality you can get great pictures of everyone celebrating and reviewing what they have just seen. A total solar eclipse is surreal and it is not uncommon for people to have varied reactions. Have your camera ready to capture them forever. Regular settings can be used. And if you missed getting any partial pictures, the drama is playing out in reverse. Strange shadows and so forth will be visible for a while.
Tip!
Be mindful of your memory and battery! The heat of the day (or deep cold) can drain batteries. If you don't need to be online, turn off any WiFi or other wireless interfaces. This will prolong the battery life. Batteries should be charged up the night before. Setting camera-phones to airplane mode greatly conserves power. Of course, that also cuts you off from online resources you might want to reference as well as phone calls from fellow eclipse chasers.
Another thing you might need to mind is the available storage. It is easy to get carried away in the excitement of the eclipse event and take a lot of images. A fresh memory card is not a bad idea on eclipse day. Be sure to test it after installing!
During totality, increase the exposure time or lower the f/stop (if possible) or use the flash option for automatic cameras (make sure the flash is covered properly). A small camera, mounted on a tripod, with a "bulb" setting so that it can be held open for a half second or more can get some great pictures of the coronal streamers and surrounding bright planets.
It can also be used to obtain horizon color changes and group pictures. There is about as much light as a full moon during totality allowing you to see the camera settings and other people. The sky near the horizon is bright and gets darker towards the eclipse. Foreground objects will be dark in comparison to the background sky. To get a picture of people during the eclipse, use a long exposure and orient camera to be looking down on the observers or with a darker background behind them. When doing this sort of picture it is critical to remember NO FLASH!
Hand held digital camera - camera lower than subjects
Hand held digital camera from standing position - above subjects, shows more horizon
Hand held 50mm SLR Zimbabwe
Using a Zoom Lens
Go out and look at the moon one night. Note how small it appears. Try to get a picture of the moon and you will see how small it is in an image. The moon is only a half a degree in apparent size (there are 360 degrees in a circle, 180 degrees in a half circle thus you could fit 360 moons side by side across the sky from West to East through the Zenith).
Chances are you are going to want to use a zoom or telephoto lens to get a closer look. The picture of the crescent moon at right was taken using a 300mm telephoto lens coupled to a standard film camera. A telephoto lens is like having binoculars or a small telescope for your camera. You can get a closer view and see more details.
There are two basic types of telephoto lens - fixed and zoom. A fixed lens has one focal length. A zoom telephoto lens has a range of focal lengths you can use.
Some cameras come with a zoom lens built into the camera. Film cameras of the SLR type (Single Lens Reflex) use interchangeable lenses with varied focal lengths, which may be fixed or zoom types. As you increase the focal length of the lens the magnification of the resulting image size increases as well. Thus a 200mm lens provides a closer view than a 50mm lens. The closer view comes at a cost. The 200mm lens will be four times larger than the 50mm lens and be heavier too. A mount or tripod to help support the camera and lens becomes essential. See Zoom accessories for more information about the types of things you need to bring along when using a Zoom lens of any type.
Basic digital cameras provide two kinds of zoom options, optical and digital. When shooting the eclipse event it is best to avoid digital zoom in the camera and strictly work with the optical zoom. In fact the best way to treat digital cameras is to turn off all the extra digital enhancements (with the exception of image stabilization) when obtaining the images. There will be plenty of time for image enhancement work after the eclipse using the computer.
Cameras that claim to have a 200x digital zoom are fooling you. A general rule of thumb in telescopes and astronomy is not to exceed 60x per inch of objective lens. For a 200x camera you'd want a lens 3 to 4 inches across and that is as big as some of the new cameras! Shut down the digital zoom and stick to the optical zoom. Even that is pushing the limits of the small optics involved - experiment on the moon to see what kind of results you can get. If the maximum zoom looks bad, try reducing the magnification factor until you get an image where the moon appears sharp.
Digital SLR cameras accept multiple lens configurations. In a digital SLR there is a chip instead of film. The chip used will vary in size with most being a bit smaller than the traditional 35mm film.
Digital SLR manufacturers provide a multiplier that can be applied when using a lens to achieve the effective focal length (a value that is handy in some computations such as field of view and estimating the image size). The multiplier indicates the relative size of the imaging chip.
For example: The Canon Rebel has a multiplier of 1.6x. That means that traditional 35mm film is 1.6x time bigger than the chip. This factor can be applied to the lens focal length to determine the effective focal length. The 1.6x factor is the result of the imaging chip being roughly 5/8ths of the size of 35mm film. With a 200mm lens attached, the effective focal length becomes 320mm.
Great images can be obtained using lenses with a focal length of 100mm and greater.
70mm
300mm
The use of teleconverters or lens multipliers is not recommended most of the time. Unless you are using a high grade, low reflection, lens enhancement it is recommended that the extra lens not be inserted. The result of using such a lens enhancement is often extra reflections in the image showing up as blurs. Test the system by taking exposures of the young or very old moon (thin crescent phase) and over exposing the image to reveal the Earth shine. Look for blurry areas in the picture, those are the result of internal reflections in most cases.
Selecting a good lens - it should be fast (low f-ratio), support all the features of your camera (be 100% compatible), allow for manual focus, and possibly support image stabilizing.
This is the lens I have been using since 2008 for eclipse photography. When used in conjunction with a Canon DSLR the 400mm lens yields an image that is roughly the same as achieved using a 600mm lens and 35mm film.
When using this lens the image of the moon uses 24% of the shorter side and about 17% of the longer side. For eclipse photography this means the corona can be photographed out to 2.5 lunar diameters on each side of the moon.
Will your camera and lens produce a close up of the eclipse or a little dot?
One way to answer that question is to determine what the size of the eclipse will be in your image relative to the imaging plane. This is the image size.
The image size (S) is calculated from the lens focal length (FL) and the angular size of the object to image (A).
S = 2 * FL * tangent(A / 2)
The measurement units for the image size (S) will be the same as the focal length (FL). In most cases this value is expressed in millimeters. Compare the value computed with the size of the imaging plane to get a feel of how large the image will appear when displayed or printed.
An image of a solar eclipse typically includes the moon and solar corona around it. The lunar/solar disk is approximately 1/2 degree in angular size. Eclipse photographers often reference the corona in terms of solar radii or diameters. That is, you might try to image the corona out to one solar radius (an additional 1/4 degree in angular size on each side) or a full diameter (add 1/2 degree to each side).
Another way to answer the question is in terms of field of view. The field of view, expressed in angular units, describes how much of the sky your camera/lens set up can see. To determine this you apply the above formula solving for the angular size (A) using the size of the imaging plane (XY).
A = 2 * arctangent(XY / (2 * FL))
Once again, it is strongly recommended that you practice using the camera and lens set up by taking pictures of the moon. The practice shots will reveal the actual image size of the moon. Remember that during the eclipse we are not as interested in the lunar details. We want to image what surrounds it in the sky (the corona and prominences). When practicing we are interested in the lunar details to get the best focus.
Prominences are about the size of large craters on the moon and the corona extends several lunar diameters away from the center. Sometimes selecting the right lens to use results in using multiple cameras - a practice to be avoided by most eclipse chasers since the enjoyment of the eclipse is greatly diminished.
Any operator of a camera with a zoom capability (one that magnifies the subject) will desire three additional pieces of equipment when taking pictures of a total solar eclipse.
Tripod to mount the camera is a requirement. When the image is magnified, any movement of the camera is magnified as well resulting in images that are not clear. A tripod will greatly assist in minimizing the movement of the camera caused by shakes, vibrations, and your racing pulse. Longer focal length photography may require the use of a tracking mount.
Cable release or remote control for the camera is recommended. These devices will allow you to take pictures without touching the camera body directly and causing vibrations.
Right angle adapter for your camera. This device attaches where you would normally look through the SLR and contains a right angle (90 degree) prism. When taking photographs of an eclipse high in the sky this device makes for a more comfortable operation.
A right angle adapter is shown attached to the camera at the end of the telescope in the image. There is also a very solid tripod and a cable release (thin wire extending from bottom of camera body) and motor drives (thicker cable from telescope is for declination control) - all of which were carried to a remote camp in Zambia where the photograph was taken.
During an eclipse event your heart will be pounding and your hands shaking; a good tripod, cable release, and right angle adapter will be greatly appreciated.
To purchase a cable release or right angle adapter for your camera, contact your camera supplier or look online at the manufacturer's web site. Modern electric cable releases are specific to individual camera makes and models, make sure you get the right one.
Camera Control
Set your Camera to Manual
Some cameras allow for manual control of exposure times and focus. These work best when photographing the eclipse. Automatic focus and light meter systems were never intended to compensate for the type of light changes and the diffuse target of the solar corona.
Cameras that feature interchangeable lenses typically offer manual control of the exposure, focus, and f/stop. You will want to use the manual settings when preparing for the total phase of the eclipse. Detailed exposure settings can be determined using the Exposure Estimate information below.
Manual focusing is a must. Automatic focusing systems have a hard time finding a good sharp edge and waste time getting the image into focus. Set the camera to manual focus mode before totality, use your solar filter to focus (or use a far distant object away from the sun). You may have to refocus slightly as totality starts and you remove your filter. Many skip photographing 2nd contact for this reason.
Automatic focus just can't deal with the image!
Many consumer digital cameras only allow for changes between icons for scenery or portraits. In most cases the scenery settings will work best since the object being photographed is distant. Experiment by taking pictures of the moon and sunsets to learn how well your camera works under eclipse like conditions. The picture will be mostly dark and some automatic cameras may be difficult to use. If you can't get a decent picture of the moon then set your camera aside and enjoy totality as an observer.
Be sure to disable the flash before totality!
You will hear the above request more than once before the eclipse. The flash is a distraction for anyone near you. As a precaution, you might consider covering the flash unit with black electrical tape just in case something is not set right. Virtually every eclipse group will have one or more members with black electrical tape available on the day of the eclipse - just ask around.
Brightness of the Corona
The corona brightness drops quickly as it gets further from the photosphere. The detail in the corona is a low contrast difference with its background meaning that a camera cannot capture the entire thing in a single shot (neither does your eye for that matter). As such, cameras allowing for variable exposure times can capture more detail in the corona.
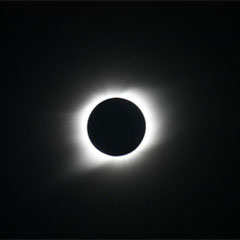
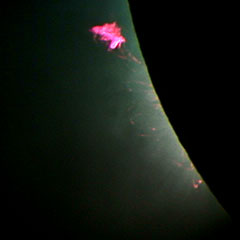
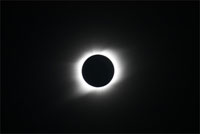
Shorter exposures will show the inner corona, chromosphere, and prominences. Longer exposures will wash out the details closest to the lunar disk but will show more of the coronal streamers and structure. Compare the two images from the 1991 eclipse above. The image on the left is a longer exposure with the same camera. It shows much more corona compared to the image on the right. You can detect the prominences in the left image - they are over exposed and more pink-white than red. This is why you cannot really capture a solar eclipse image that matches what the eye sees - not yet at least.
Practice by taking pictures of the moon. The inner corona is as bright as the full moon and the prominences are even brighter. Just one lunar diameter away from the disk the brightness is a quarter the intensity and at two or three diameters it is dim as the background sky. Streamers can be seen up to six diameters away with binoculars or a well trained (and dark adapted) eye. Remember, each lunar diameter is only half a degree.
To obtain a good image of the corona you will need to take multiple images with variable exposure lengths. These images are then stacked and processed later in the computer using a tool like Photoshop.
My recommendation is to start with a shorter exposure and then increase by one setting for another on up to the maximum exposure for the session. Time allowing, repeat the progression in reverse and then wait for third contact before attempting to get a picture of the diamond ring.
Automatic control
The ultimate dream of many eclipse chaser/Photographers is to have a reliable system control the camera while sitting back and enjoying the eclipse view. Many modern cameras support repeated exposures, bursts, and other features that are quite useful when photographing an eclipse. So how can one take advantage of such tools?
Click-Click-Click
Does your camera support burst mode? If so, then you can make use of it. Burst mode takes more than one picture, at different f/stops or exposures, to bracket an image. This is exactly what one should do during a total solar eclipse. A longer exposure brings in more corona while a shorter one reveals prominences. Cameras I've worked with allow for 1 or 2 f/stops worth of exposure changes.
An Intervalometer can be used to automate the clicks further. An intervalometer is a device that can be programmed to repeat clicking at regular intervals. That relieves the operator of having to keep pushing the exposure button. If you are happy with the range of the burst and have an intervalometer then you are there! Set the intervalometer to run exposures every couple of seconds for the duration of totality (add about 10 seconds at the start and end) and you will have a nice set of images when it is all done (assuming the camera remained pointed at the eclipse, was in focus, and the exposures reveal the details you are after).
An example is the Canon TC80N3 controller which features a variety of timing options - perfect for the eclipse photographer that does not want to mess with a camera during totality. I used the TC80N3 during the eclipse of 2008, on a moving ship, in conjunction with a 400mm lens on a tripod. Although a large number of the images are not centered, most came out quite good. During totality I adjusted the base exposure and used a three shot burst +/- 1 f/stop.
Most modern digital cameras for professions offer timers and intervalometer interfaces.
Computer Driven Eclipse Photography
Computers can be used to run the camera. This means you are carrying along a computer of some sort, most likely a lap top. To connect the computer and camera, use the same cable used to move pictures from the camera to the computer. This is normally a USB cable.
Instructions are sent from the computer to the camera. Modern cameras support remote control with instructions such as setting the ISO, aperture f/stop, exposure, and file format details. Under the control of a computer program design for solar eclipse photography an entire range of images can be created.
Several programs can be downloaded directly from the web (listed below) and installed on your computer. I cannot stress strongly enough that practice and preparation time is needed. Not only do you need to adjust the programs to your own camera specifics (normally by changing parameter or script files) but you will also want to be as comfortable as possible when running the assembly during totality. Otherwise you could miss the eclipse fiddling with things at the last second.
Personal Experience: I've always run the camera manually during a total solar eclipse. The reasons are to reduce the amount of equipment to carry along as well as the general rule of thumb - keep it simple. During the Total Solar Eclipse of 2006 I handed control of the camera and telescope to another (our daughter). This allowed me to experience the eclipse like I've never seen it before (and this was my 11th total solar eclipse experience). Also, by bringing her along I could bring additional equipment. A Coranado hydrogen alpha telescope in this case.
2009 was my 13th total solar eclipse. Our daughter did not come along this time. Thus I introduced a lightweight piece of equipment to the process - an intervalometer. This tool performed wonderfully. It allowed me to watch the eclipse while the camera clicked away. Using the three shot burst I obtained a good range of images using a tripod mounted 400mm lens on board a moving ship.
For 2010 I used a small lap top computer to increase the ability of the remote control. The key to success, even with automated solutions, is to practice and make sure you fully understand every step involved (plus counter steps in case of problems). The software I was using did not synch properly with the GPS and the timings of the 2nd and 3rd contacts were off as a result. The rest of the program worked great - the ship moved a lot and I was forced to reposition the camera constantly but I could see that from a stationary position, this solution was optimal.
Using a Small Telescope
There is nothing that compares with the view of a total solar eclipse through a telescope. It is like the difference you experience of looking at the moon with just your eye and then a telescope. It doesn't really matter what size of telescope you are using - the view is very different. With a telescope the craters and mountain ranges are revealed and the moon takes on a very different appearance. The view of a total solar eclipse through a telescope is much the same. Prominences are amazing and the corona simply fascinating.
Unlike most astronomical uses of a telescope you do not have a lot of time to study the object in the eyepiece. You most certainly do not have much time for changing eyepieces or inserting a barlow lens. That said, I confess to having done both. Before the eclipse I practiced doing the same with the telescope by looking at the moon, memorizing the twists of the focuser, and perfecting the 'no look' rapid change of lenses. The Questar telescope is marvelous at this task with the built in barlow lens. All that is a required is a flick of a switch to swing the lens into place and a twist of the focusing knob.
I found the best views to be with a wide field eyepiece, 25mm or larger. You can see plenty of detail and still get a good overall view as the scene slowly changes. Looking closer you can see the prominences slip behind the moon's edge or appear against swirls in the corona as totality takes place. With the wide field eyepiece of the Questar (32mm) the magnification is approximately 40x and the angle of view about 1.3 degrees. The moon's half degree size fits comfortably, the prominences pop out in an almost 3D fashion, and the inner corona glows with neon threads twisted around each other - it really is something to behold.
When visiting another hemisphere (for me, going South of the Equator) a small telescope is a lot of fun if you get a chance to do some night time observing. Bring along an atlas or sky map to help navigate the new and unfamiliar sky looking for the 'best of' with the telescope - it really is worth the hassle of carrying it along in most cases.
But what about photographing an eclipse with a small telescope?
First off, let me define what a small telescope is from my perspective. Small telescopes are those with an aperture of 5 inches (12cm) or less. A popular term for a small telescope is a "grab and go" scope. The type of telescope you can quickly carry out into the night for a fast view of a planet or the moon. Folded optics make for very compact and portable telescopes although small refractors should not be ruled out. If it can fit in the overhead storage of a modern airplane then it is a-okay for eclipse chasing.
When using a small telescope and camera, a good mount is essential to get good photographs and to enjoy the experience overall. There have been many cases where the tripod was forfeited to allow for packing something else only the render the telescope useless or frustrating to use during the eclipse. You can gamble that you will find a table or some other platform to set up on but in my experience that is not recommended as you will most likely miss out on viewing the eclipse itself.
During totality a small telescope will yield fantastic views and photographs of the inner corona, prominences, and chromosphere. You can see great detail in the prominences and short exposures will yield beautiful pictures of this phenomenon. Using fast film such as ASA 400 or a good digital camera, exposure times should range from 1/500 to ½ second in time. Longer exposures to reveal the outer coronal structures are possible. Longer exposures also bring up tracking problems as the Earth's motion is greatly amplified by the magnification. This problem is solved by using an equatorial tracking mount and many smaller telescopes provide the perfect solution with a built in drive.
Computerized mounts provide a nice way to track objects in the sky once properly aligned. During the day light hours only the sun will be visible and some systems require stellar sightings for alignment. You can either set up the night before or accept the initial locations as okay without verifying. When used with photography a computer driven mount will be fine so long as the telescope and camera are well balanced, do not put too much stress on the drive motor, and the exposures are relatively short. Longer exposures are not needed during a total solar eclipse thus field rotation will not be an issue. It is highly recommended that you practice by taking pictures of the moon when it is at about the same altitude in the sky. This exercise should reveal any problems your mounting system could encounter.
When preparing to bring a small telescope for photography purposes, be sure to figure out some way to get in some observing with a moderate power eyepiece as well. My favorite magnification for viewing an eclipse is at 40x to 50x. At that power one can see the corona and prominences all at once and a great amount of detail is visible that you cannot see with binoculars and the naked eye. You will not have much time for this luxury and I should note that sharing the experience is almost impossible except during very long eclipses of 4 or more minutes.
1991 Total Solar Eclipse - Baja Mexico - Questar prime focus (~1350mm)
Using a Larger Field Telescope
Using my simple rule of thumb, a larger field telescope is one with an aperture of 5" or more. Another way to think of it is a larger telescope cannot be easily carried out to the drive way or yard in one load. Despite the difficulty in transporting a larger telescope, the views and photographs can be very worthwhile. Or so I have heard. I must confess to having never brought anything larger than an f/10 4.25" reflecting telescope. That was for the 1972 and 1973 eclipses viewed from on board ships. The view was excellent using a 1" eyepiece (about 45x). For subsequent eclipses I've used a Questar telescope and binoculars. I can only imagine what it looks like through an eight inch (20cm).
Larger telescopes tend to have longer effective focal lengths and may not show the entire ring of the moon. They are best suited for looking at the chromosphere, corona streamer details, and prominences. Or you can attempt to see stars behind the corona near the sun. For scientific studies these telescopes are essential. I just can't say that they are recommended for the few minutes you have available under the umbra. My favorite views of the eclipses I've seen have been through smaller telescopes that showed the entire moon and a lot of corona in the same field of view.
An f/10 8" Schmidt Cassegrain has an effective focal length of 80" or 2,000mm. This is about the maximum focal length that can be used to photograph (35mm film) the entire lunar disk and still see some of the surrounding solar atmosphere. A 35mm camera will barely hold the lunar image hence very little of the corona can be photographed. On the other hand it is possible to image stars through the corona, do spectral imaging, and obtain close up views of prominences in white light.
"Light buckets" or very large telescopes are not needed for a total solar eclipse. The corona is very bright and you will not be interested in deep space objects during the eclipse event. I can imagine that very large apertures will diminish the quality of the view and unless you are engaged in scientific studies requiring such optics (such as detecting gravitational effects of starlight near the solar disk - use radio waves and go enjoy the eclipse!) The expense of bringing very large optics along may not be worth it. For the ease of travel and best view, a smaller telescope is the winner. The next best solution is a good pair of binoculars.
Perspective: The 1991 total solar eclipse path crossed over some of the largest telescopes in the world located in Hawaii. There was a documentary showing the preparations and other scientific work the observatory astronomers were engaged in at the time. My favorite scene from this documentary is when the astronomers all run out of the control booth during totality to view the eclipse through a 3.5" Questar telescope.
Mounting the Camera/Telescope
Do you really need to pack a tracking mount?
Mounting of a camera or camera/telescope combination requires some consideration. A tripod or rigid post capable of holding the equipment is essential when using any sort of long lens. Even a shorter lens will benefit from a mount because during the total solar eclipse you may be too excited to hold a camera steady.
The question is whether you can use a regular tripod or do you need something better suited to astronomical picture taking - a tracking mount.
Any experienced astrophotographer will tell you that an equatorial mount is best when taking pictures of things in the sky. An equatorial mount is one that tracks the sky during the course of time. The most common has one axis pointed at the pole (north or south) allowing it to rotate slowly matching the turn of the Earth.
The Earth rotates about an axis once a day. That means that the stars along the equatorial part of the sky move (relative to an observer on Earth) once a day or 360 degrees per day, 15 degrees per hour, 0.25 degree per minute, 0.004 degree per second. It works out that the stars move at about 15 arc seconds per second of time at the equator.
As the target star is located closer to either pole the speed slows down by a factor of the cosine of the declination angle until you are at the pole; at which point the stars in that region do not appear to move relative to the Earth bound observer (like the North Star which is pretty darn close to the 90 degree mark and thus appears in the same position of the sky every clear night).
Astrophotographers use an equatorial tracking mount when taking pictures of the stars. The mount moves very slowly and follows the star across the sky. To move the mount a small electric motor is often employed. The size and weight of the mount, motor, and counter weights will often be several times that of the telescope and camera.
Note that many commercial tracking mounts do not account for the slightly different speeds that the sun and moon are traveling relative to the back ground stars. To obtain 100% tracking of the sun you will need a variable speed drive that can be set to keep the sun centered. The sun is moving at rate slightly slower than the background stars when viewed from the surface of the Earth (1/365th of a day slower).
The issue is that equatorial mounts tend to be heavy. When packing for a solar eclipse chase weight can be very important. Heavy counter weights and mounts can mean the difference between regular luggage and paying for overweight luggage.
There are two reasons you might elect to bring along an equatorial mount.
To assist in keeping the image centered.
To allow for longer exposures.
Looking at the first situation - A tracking mount will keep the image in the center (when set up right) but if your focal length is not very long then you can get away with out one. For every minute of the eclipse the sun moves about a quarter of a degree in a fixed frame. To see if you can keep the image in the view calculate the field of view and size of the image. The total image will shift a quarter degree for each minute; or one and a half degrees for a long, six minute eclipse.
Determining if you really need to bring an equatorial mount is a function of the focal length of the camera/telescope you are planning to use as well as the types of images you hope to obtain. The situation can be summarized as saying that the longer the exposure and the longer the focal length, the greater the chance you need to haul a heavy equatorial tracking mount (with a small motor) along.
You can calculate the maximum exposure without star trails if you know the detailed size of the imager or film plane.
Mounting a Camera/Telescope
Do you really need to pack a tracking mount?
Calculated Answers
The maximum exposure without smearing (no star trails) for a fixed mount is a function of the focal length and the type of receptor.
The type of receptor may be film or some electronic device such as a CCD (Charged Coupled Device) or CMOS imaging chip. What we need to know about the receptor is the density of the individual light receivers (pixels for a chip) or in the case of film, the resolving power. Given that data the speed which the object appears to be moving is applied to find what the maximum exposure can be before the image smears. For nicely arrayed electronic imaging systems the math is pretty straight forward. Film resolving power power is matter of discovering the Modulation Transfer Function (MTF) for the film from the manufacturer.
It is important to note that this is a theoretical approach and only serves as a reference point for starting. There are other factors involved in getting "perfect pictures". Field experiments and lots of practice taking pictures of the moon and stars are highly recommended.
Math behing the Calculator
- The first step is to calculate the field of view (actually, the angle of view) for the camera and lens. Using the same units of measurement for the width of the receiver (W) and the focal length (F) we get an angle value as the result.
Field of View (FOV) = 2 * arctangent (W / (2 * F))
Note: A simplified version of this formula can be used to obtain the field of view because the angles tend to be small when using a telescope and camera.Field of View (radians) = W / F = FOV
Skip this step for film, applies only to digital cameras. Pixel density (pD’) and pairs density (pD) from sizes (X and Y) of the chip and total pixel count (P).
pD' = square root of (P / (X * Y))
pD = pD’ / 2
The film Modulation Transfer Function needs to be located from the manufacturer of the film. Generally this information will be supplied in the form of a curve from which you will have to interpret the number. Find the value where the response (%) drops to 20% (a cut off resolving power for most applications) and use the associated spacial frequency value (cycles/mm). This number is typically between 50 and 100.
The next step is to convert the "density value" into angular units. Note that this is really not the density in the case of the film. For film this value is the resolution limit as defined by the input MTF value.
The value to be produced is the distance between sensor elements expressed as an angle (SD). For this we need to know the field of view as well as the density or linear resolution in terms of pairs/mm (D) and the size of the sensor plane in mm (W).
SD = FOV(degrees) * 60 * 60) / (D * W)
We know the eclipse is moving at a relative speed of about 15 arc seconds per second of time (for a stationary camera system). NOTE: Because we are imaging eclipses which occur within 23 degrees of the celestial equator the declination aspect of the star trails will be ignored. This set of calculations is based on an object at or near the celestial equator.
Now we can determine the time (t) it takes to cross a pair.
SD / 15 = t
The resulting value is the exposure time where smearing or blurring across the pairs will start to appear. Set your exposures to a value less than that and you do not need to track the image using a heavier equatorial mount. Of course, the focusing is left up to you!
-Programmed by Bill Kramer March 2009 based on an idea by Glenn Schneider and a question posted at the SEML.
Yes, you can do this at home!
The easiest way to determine the maximum exposure you can use without any star trails or blurring for your camera and lens is to use the following equation:
The Declination of the object in the sky can be obtained from tables and charts. As the declination approaches 0 degrees the cosine approaches 1, and as the declination goes to 90 degrees at the poles the cosine value becomes 0. This equation is to be applied for celestial objects between those two extremes.
The Focal Length is the effective focal length of your optical system. Often times this is simply the number printed on the zoom lens.
The harder number to find is the "Magic_Number". The magic number is a factor that is found through experimentation and will vary for different cameras.
Using a fixed mount and your camera you can set up a basic test to learn what the maximum exposure time for any camera will be, shooting at any declination. You need a good clear night and some time to accumulate the data. I originally did this experiment using film (Kodak Tri-X) and can assure you it is much easier with a digital camera!
To save you the cost of processing some film the numbers I use are 1000 for very grainy film and 300 for pretty good film.
How to get the Magic_Number for your camera:
Use a standard lens, (50mm is recommended), find a place you take longer exposures of the stars near the celestial equator. The best (easiest) target is the belt of Orion. The northern most star of the belt almost lies on the celestial equator (declination is zero). Orion is not visible all year long, so you may need to consult a star atlas for other candidates. Sometimes the planets are in the right position making for another easy target.
On a clear night with the best possible conditions (fair temperature, low humidity, no winds) set up your tripod and camera facing Orion. Focus the camera as best you can manually. Automatic focus is not going work. Using a cable release (or remote control) take a series of pictures starting at 5 seconds and incrementing by another five seconds up to about 45 seconds. The result will be a set of images at 5, 10, 15, 20, 25, 30, 35, 40, and 45 seconds.
Take the images back to the computer and zoom in on each of them. The examples above show a series of photos taken with a 50mm lens and a Canon Digital Rebel. Each exposure was progressively longer and in exposure 3 you begin to see trails.
Now look at your own pictures. At what exposure do you start to see streaks or star trails? At what exposure do you see no movement at all?
I recommend that you repeat this experiment a few times to make sure your data is consistent.
Multiple the time exposure of the longest exposure that does not show any star trails by the focal length of the lens in use. For example, let's say that you notice no trail at an exposure of 10 seconds and do notice the start of one at 15 when using a 50mm lens. Multiple 10 by 50 for a factor of 500. If the movement shows up slightly at 10 seconds but not at all at 5 seconds then use the five value to achieve the starting factor. If you want to try for a more precise factor then repeat the experiment bracketing the two values and use a smaller increment.
The factor just found by experiment can be plugged into the equation above as the "Magic_Number".
Glenn Schneider, "The Umbraphile" from Steward Observatory: "The question is: Without tracking, do I need to worry about intra-exposure blurring?" This question
has a built-in assumtion that the sharpness of an image is limited (without tracking) by
image motion across the field of view due to Earth rotation. That may not be
the case, such as other effects such as image focus could dominate. Assuming it
is, however, that then in part depends upon what the "spatial frequency" cut-off response of the
detector or film is and will set what the maximum exposure duration would be.
Sampling theory basically
says that you must put (at least) TWO sensing elements (pixels, or chunks of
silver halide grains for film) across a "resolution element" or you will "undersample" the image at the focal plane and loose information. So, to answer this question
you need to know what the sampling density of photosensors. (When one assumes
a "diffraction limited" optical system, this says for imaging point sources like stars
that your image sensr must lay down two sensing elemets across an optical
resolution element which is essentially the Airy resolution limit. (1.22 lamda/d).
For electronic detectors that is simply the number of "picture elements" or "pixels" per
linear spacing since they are laid out in neat and constaly spaced rows and colums. For film, that
depends upon the (size and) density of photosensitive silver
halide grains in the photographic emulsion. For film (but also for electronic
detectors) the limits of its "spatial frequency" response is often expressed by
its ability to sharply record alternating pairs of equally spaced and equally
wide light and dark lines and is expressed ususally in "line pairs per millimeter".
Some additional details about that are follow. Of course OTHER things
can degrade (blur, smear) an image, but the question is for what maximum
exposure time will image "smear" due to Earth rotation dominate.
The limiting spatial frequency reponse is determined by laying down a physical line-ruled
mask on the film (applicable also for electronic detectors), so
one doesn't have to worry about the quality of forming an image of lines by an
optical system and exposing the film with the mask in contact on top to light.
When the perfectly opaque (black) and transmissive (white) lines are "far apart" relative to the pixel (or silver halide grain) spacings, the recorded center of the
black and white lines are 0% or 100% intensity and the "picket fense" is a
sharp square-wave. As the lines get closer together and thinner and approach
the spacing of the sampling elements, the recorded edges of the alternating
light and dark lines "roll off" and become soft and the center of the dark lines
become less dark and the center of the bright lines become less bright. The "input" square-wave (alternating dark and light lines) becomes modulated like
a sine wave of decreasing amplitude as the line spacing approaches the sensor
element spacing -- and when it reaches (or gets smaller than) the "Nyquist limit" (of basically two sensing elements per line spacing) what is recorded on the
image will have "zero modulation" and appear uniform gray. The ratio
of the high and low recorded line intensities is the image "contrast". When the lines
spacing is far apart relative to the spacing of the sensing elements the recordable
contrast is large -- but declines with smaller line spacings. The contrast that can
be acheived with a given film as a function of the (black/white) line-pair spacing
is, essentially, what is known as a "modulation transfer function". If the MTF is
100% then there is a perfect transfer, no loss of contrast, and the sharp lines remain
sharp. If the MTF is zero (or very small), as when the line-pair spacing is smaller
than the spacing of the sensing elements, there is no modulation and all you get
is a uniform gray. When the number of line-pairs per millimeter is equal to twice
the number of sensing elements per millimeter the sampling is equivalent
to being at the "Nyquist limit" for resolving the line-pairs. That, actually - for
uniform sampling (like pixels spaced evenly in an electronic detector) can be
computed directly. For those who think more digital than analog, this is
equiavlent to the high frequency cut-off point of the Fourier transform of the
power spectrum of the input image.
You can prepare to photograph a total solar eclipse by taking practice pictures of the moon during various phases
.
A solar eclipse happens "around" the moon and the corona will extend two to five times the lunar diameter. Don't worry if your 200mm-lens system does not reveal lots of lunar detail. The moon's surface is very bright by comparison. The goal is not to get great lunar pictures but to practice using the camera and lens system.
The amount of light you will have to work with is about the same as during a full moon meaning that you should have little to no trouble reading the exposure settings on your camera. As you look through the lens, the brightness will be about the same as a quarter phase moon (or less).
To learn just how long of an exposure your system can take, and get crisp detail, try taking a series long moon exposures to get a feel for the movement of the moon. The best time to try this is during the crescent phases, when you can see the Earthshine on the entire surface of the moon.
Star trails are not a desired effect in solar eclipse images. You can experiment with different time exposures to see when trails begin to show in the images. During the eclipse you will want to keep your exposures less than any image that shows star trails.
The partial phases of the eclipse can be photographed using a solar filter if you have a longer lens or telescope. The amount of light will lesson during the eclipse requiring changes to the exposure setting. You can find the proper exposure ranges for your configuration by taking a range of solar pictures. Vary the time from noon to near sunset or with variable cloudiness. If you have a telescope, the right exposure should also show sunspots.
It is important to have a strategy in mind when getting ready to photograph the eclipse. The best rule of thumb is to keep it simple since there is too much to see and experience all at once. You can practice your strategy using the moon and having a good watch to count down the time remaining. My simple strategy is to start with faster exposures around 2nd contact then increase the exposures during the eclipse and finish with fast exposures again as we go into 3rd contact.
A Moving Platform
Part 1: Photography from the Sea
When taking a picture from a moving platform, such as a ship, timing is everything. First off you will be taking shorter exposures than you can on land. Even if you have a very stable mount, the ship is moving slightly. And that movement is magnified when you magnify the image.
To get the maximum exposure: As totality grows near check the image (using a proper solar filter) in the viewer to see how much it shifts. Locate where the image holds still the longest and try to center the sun there. Then you will have to time your images to start and end when the image is in that location. Depending on the size of the ship, the sea conditions, wind across the deck, and numerous other factors out of your control at that time: the exposure you might get away with varies.
Most of the time motion on a ship will follow a basic sine wave pattern. This means that the rate of movement will be the least when the roll is at its greatest or lowest points. My strategy: Center the picture at the top of one roll, then snap it on the next.
Sometimes a ship will remain moving during the eclipse itself in an attempt to minimize wind across the deck and to make use of the stabilizers. When that is the case, you can no longer time the roll of the ship and will have to work with even shorter exposures. Vibration and random wave patterns mean that you have to keep your eye on the eyepiece and fire off exposures as they are available. The problem with this technique is that you will spend more time watching the camera viewer with an off center or empty image and less time enjoying the eclipse.
For most the best thing to do when observing an eclipse from a moving ship is to simply sit back and relax, enjoy the view with binoculars, and the fantastic experience of cruising! Because there is plenty of room most people remain seated or in one place making collisions and so forth rare - but they have been known to happen. If you are on the ship with friends and family ask them to sit in places that help block others from obscuring your picture or walking in front of you.
The greatest danger to equipment comes at the end of the eclipse when everyone is celebrating and the captain turns the ship so that the wind is no long negated. At an eclipse in Caribbean we saw tripods and cameras go falling as the ship turned a strong breeze kicked up across the deck. We also saw little kids running around carelessly. My best advise is to set up blockers, pack up quickly when it is over - then celebrate!
It is important to note that you cannot take as many pictures when working from a moving ship, but it can be done. And to the eclipse photographer, that is the important aspect.
Part 2: Photography from the Air
In my experience this is the most challenging type of solar eclipse photography I’ve ever attempted. Airborn based total solar eclipse photography imposes numerous restrictions and limitations. For starters there is a restriction on how much equipment you can carry with you, limited space for the equipment, limited window size, and unpredictable vibration/movement during the eclipse run.
Moving at a substantial speed, with large engines providing the thrust, modern aircraft are not 100% stable as they slice through the sky, not even close. Using binoculars or a long lens you amplify the movement. Couple that with random turbulence (wind and air pressure changes) and you’ve got a real problem getting the longer exposures needed to capture the outer corona. Given these issues it is small wonder that most select to simply view the eclipse.
The good news for the few of us still determined to photograph the eclipse is that it can be done with the right equipment and preparation.
The most basic equipment for photographing from a jet will be a simple hand held camera. Don’t both trying to capture the corona but instead focus on the ground and clouds below. That’s where the sunset colors will be found.
To photograph the corona and prominences you will want a longer focal length lens, image stabilizing, and a decent mount. For image stabilizing use a commercially available lens and camera with the feature included - they do a marvelous job. Enhancements to the equipment might include the use of a floating mount (suspended by cables) along with small gyroscopes to hold it in place and hands free operation of the camera system. Visit Glenn Schneider’s set up for the August 2008 eclipse to see just how far you can go - if you get access to the cockpit.
One of the biggest challenges facing the aircraft based eclipse photographer is the window. Aircraft windows are not very big. On commercial jets, the most likely to be used, they measure under a foot across and just over a foot high. This is not much room for both viewing and photography. Thus when using a larger lens plan on watching the eclipse through the camera view finder. You might be able to fashion a small mount to share the precious window space but it is a very limited space and nearby all surfaces are subject to their own vibrations.
Preparation tip: To visualize how much room you have tape a regular piece of notebook paper on the wall about three foot up at the bottom and then contemplate about how you can point a camera/lens and get a view though that small port hole.
The next problem to consider is a mount. Unlike land or sea based eclipse photography you will very limited room in which to work. The space between seats in a commercial jet is not adequate for a proper tripod meaning that some creativity may be needed such as placing one or two shortened legs on the chair.
Preparation tip: To experiment ahead of time use the piece of paper on the wall from the previous tip. Place a regular chair next to it (facing like it would on the aircraft), and then see how much room your tripod (or monopod) will consume. The smaller the better. Just make sure it is strong enough to hold your camera and lens and does not wobble when vibrated.
One of the more frustrating challenges are the ever changing rules of carry on luggage. Be sure to check ahead of time since you will not want to be surprised at the security barriers. Eclipse dedicated flights can sometimes arrange to have extra carry on. This was the case with our experience. The eclipse flight operator had made gotten clearance for our group to bring more equipment than normal. The best thing to do is ask well ahead of time.
During the eclipse of August 2008 I used a 400 mm f5.6 lens and shot a range of images up to 1/25th of a second in duration. Using the fast lens along with a fast digital camera set to an ASA of 400 the images did manage to show the corona out to two lunar diameters clearly. But it was not without some difficulty we beyond my control. The images are slightly out of focus because they were shot through fogging windows. I had other (uninvited) passengers attempting to see the eclipse that bumped me. Denise was sitting in the chair where one of the tripod legs was positioned. She was holding both a video camera on her knee and a small hand held camera. The chair was being moved by people in the row behind us. And she had little points of frost on the window. All in all - the most challenging eclipse photography we’ve encountered to date. I am very pleased the pictures came out okay making it all worth the effort.
Filters
Solar filters are made of very dark material and intended strictly for use visually or with a camera - not both! Another way to say this is don't use visual solar filters with your camera and do not use a camera or telescope solar filter without the camera or telescope. Because a lens is gathering more light it is very important to get a solar filter matched to your telescope or camera lens.
Solar filters should go in front of all other optics. Solar filters that attach to the eyepiece should never be used. Highly focused light could cause such a filter to over heat and crack. A proper solar filter fits on to the front of the telescope or lens absorbing the solar energy before it enters the remainder of the optical path.
Most solar filters appear mirror like or very shiney. That is to reflect most of the sun's light and only let a little bit through to your eye or camera. Before using a solar filter be sure to inspect for any damage. When observing the sun using a telescope you only get one chance at a mistake - extra caution is always advised. Double checking is not enough.
Another safety tip is to be very aware of the disposition of the filter when in use. Filters that fit on the front without any means of securing the filter to the tube can be dangerous when the wind picks up (or a little kid gets curious). Joe Cali presents an excellent solution in his article about mounting solar filters.
Some filters are made of a silvery material that is flexible (hence it can be punctured, so be careful with it). Others are made of glass. Glass filters often provide an orange color sun while the flexible materials are typically blue. Neutral density solar filters produce a pale white to yellow sun color when imaged. My preference is for a dark yellow color in photographs - which can be obtained using any solar filter and some digital manipulation.
Hydrogen -Alpha filters are a lot of fun during the partial phases as they can reveal surface texture and give you an advance peek at the prominences. HA filters only reveal the sun in the deep red color produced by hydrogen as it looses energy in the chromosphere of the sun. Images are deep red but often enhanced using image edit software to produce yellow-orange and red mixtures. During totality solar HA filters are useless, they block most if not all of the light.
O-III, polarized, and other sky filters do not show anything interesting either, at least in theory, I have never tried them during an eclipse. There just isn't enough time for such things. Stick to a wide field eyepiece, there is plenty to see.
Filters - Projection viewing
The safest and best way to view the partial phases safely is with a projection system. A simple projection system can be constructed by holding a pair of binoculars about one to two feet away from the floor or a light colored background such as a beach towel. A flat surface is best. Focus or move the binoculars until the solar disk is focused, there will be two of them on the ground or projection screen. A picture of this sort is a great reminder of the fever that is building as totality approaches. You can get people and the eclipse all in one shot with a regular camera using regular outdoor settings.
Video Camera
My own experience with video recording an eclipse is rather limited. However, Denise has used a handheld camcorder at several eclipses to record the event as far back as 1991. The most precious component has always been the audio where you can hear the reactions of everyone around us. Over the years, as camcorders have gotten better, she has continued to use it in a handheld fashion to get some wonderful video of the eclipse, the environment, chasers, and of course the audio.
Consumer video cameras do not have the same resolution (number of pixels) as digital cameras and are not as robust in terms of optics. There can be a lot of scatter noise when the image is viewed. Below are some video image examples (captures). Video links posted by others at youTube are also provided (do you have an eclipse video on youTube? Email the author the link.)
Camcorders are pretty easy to use and you really can't go wrong giving it a try. The people reactions are really the best and the noises you hear during the eclipse are sometimes pretty amusing - especially if you were there.
Make sure your batteries are fully charged. Having an extra battery is a good idea since the set up starts early and the celebration continues long after totality. Keep an eye on how much tape/memory remains - you don't want to run out just as totality begins.
Denise's Video Tips
Based on Denise's experiences here are some tips for using a consumer grade video camera. Professional videographers might want to just glance through this material since it is really intended for the casual camcorder operator.
The best part of the video is the audio. You cannot hope to capture professional looking images with a consumer camera however the hoots and hollars, cheering, and assorted noises of the eclipse experience are wonderful.
The camcorder will not focus right away on the eclipse or horizon. If you want to keep the camera on these items plan to use manual focus, set it ahead of totality, and don’t forget you have it on if you try to get people pictures.
Digital zoom is kind of useless, stick to the optical zoom and only use about half of it. Consumer hand held camcorders have small lenses and small chips.
The video display should be reduced in brightness before totality so that you can see more than just the display. Other people around you will appreciate it as well. If you have an eyepiece style option for viewing use it. You will be 'blinded' in one eye, but still able to see the eclipse.
As the eclipse sweeps overhead the camera will try to compensate and thus cannot really capture the sudden change of light to dark when in automatic mode. If you leave the gain in manual mode there is a chance you will get nothing but black once the shadow falls apon the camera.
Use the video unit to capture the horizon and changing light as best possible at second contact. You can integrate close ups of the corona at the computer edit station later. A slow sweep of the horizon with eclipse chasers in the foreground makes for fun video after the event. It doesn’t have to be smooth and perfect to be enjoyable by all that were there.
Do plan to try and capture the diamond ring at third contact. As third contact approaches focus on the corona and just watch the show. When the brightness starts to cause the image to bleed (vertical white lines) move the camera away from the sun so you don’t fry anything inside the camera.
Keep rolling after totality. It may take a minute or two but the reactions are priceless in many cases (turn automatic focus back on). Initially there will be cheers and screams of joy but then the conversation kicks in and everyone talks at a rapid speed with the kind of enthusiasm that only comes with such events.
A quick release type tripod will allow you to enjoy the eclipse and keep the camera on. You can attach it just as totality gets underway and release it right after third contact. Placement of the tripod in the midst of your group ensures you get a good sound track even if the video is very static for the few minutes of totality.
Zooming in and out does not really improve the video. Especially if the focus is slightly off or you have a lot of movement.
Technology of consumer grade video cameras is rapidly improving. The electronic components are getting smaller and the storage capacity continues to grow.
Three generations of camcorders. Left to Right: 2009 JVC Everio 1920x1080 HD, 2005 Panasonic 3CCD GS-250, 1994 Nikon VN-870. Today's cell phone cameras are smaller and are capable of video recording however the tiny lens makes them all but useless in terms of getting a good video of the eclipse.
Digital Cameras
Digital cameras are great. They are a major improvement over film cameras for a number of reasons. While standard 35mm film is typically limited to 24 and 36 exposures, digital cameras can hold well over a hundred high resolution images. If you have a bad shot with a digital camera you just delete it instead of wasting the film space. Most digital cameras come with on board software that makes picture taking a breeze, you just point and shoot. Digital cameras are features on portable cell phones, can fit into a shirt pocket, or can be set up for direct communication to the Internet for live video feeds. Digital cameras take eclipse photography to a different level.
Consumer digital camera technology operate at a level desired for eclipse photography. Brightness ranges and density are now superior to most films. If you are not sure about yours, test it by taking a few pictures of the moon and see how they come out.
Types of digital cameras:
Example (Simulation)
Tiny - in a cell phone - great for capturing images of people before, during, and after the total phase of the eclipse. Does not do well with the eclipse itself since all you get is a blurry white area with a tiny black dot in the middle at best. Horizon colors and the rapid darkening can be imaged. Be polite when taking pictures during totality and stay still.
Small - pocket camera - excellent people pictures before, during, and after totality. Pictures of the eclipse will result in a somewhat blurry corona and black center. Can produce nice images of the horizon and sky colors, shadows, and silhouettes of eclipse chasers against the brighter sky. Make sure the flash is covered with black electrical tape or turned off!
Regular - SLR with removable lenses - professional grade cameras that accept multiple lenses or can be attached to telescopes. Using a wider angle lens these cameras are wonderful for before and after pictures, colorful views of the sky and extended corona, and silhouettes of eclipse chasers during totality. Zoom lenses will bring increasing details of the eclipse into view. The subtle shades of the corona, twisted details of streamers, and even prominences can be resolved clearly with sufficient optics.
Astronomical - replaces eyepiece on telescope - requires computer and possible cooling system, very sensitive to low light and much deeper depth of shades. Astronomical web cam type cameras designed for color photography of the planets and moon can be used even though they may be at too high a magnification for anything beyond prominences and detailing the visible edge of the moon. Typical lunar/planetary web cam set ups are meant to replace a 6mm eyepiece.
Usage Tips
Turn off the review mode where the image is flashed on the display for a second or two. Those seconds add up during totality and there will be plenty of time to check out the pictures after the eclipse.
Turn off the video display unless you are using it for focus. Do note that the light from the display will cause problems for anyone doing longer exposures with a wide angle camera set up behind you. Be polite, set the brightness to a minimum before totality.
When using a zoom lens, set manual focus mode. Automatic focus rarely gets it right. On more automatic cameras you will need to override the focusing system and set it to or near infinity.
Use manual exposure settings to shoot a range of exposures. If your camera has the memory available the best thing is to take more than one shot at each exposure setting. Shorter exposures will reveal the inner corona details and prominences. Longer exposures show more of the corona while the area nearest the moon washes out (is over exposed).
Use automatic bracketing if it is available for your camera. Automatic bracketing will increase and decrease the exposure (or f-stop) saving your the need to change to those exposures. This feature is common on Digital SLR cameras.
Set your camera to the maximum resolution or quality. In most cases this will result in fewer pictures per memory card since they take up more room. Bring extra memory cards and use a fresh one for totality if you are going to take a lot of pictures. JPG format is not the best way to store pictures before processing them. Use a native format for the camera such as RAW.
Do not set a high ISO/ASA value. 200 to 400 is more than enough. Higher ISO values will result in more noise.
Shoot dark frames before and then after totality for your image processing needs. Do not waste the precious minutes during totality making dark frames. Averaging the dark frames will provide an adequate processing base.
For cameras with built in lens systems, use optical zoom and not the digital zoom. The digital zoom will result in artificial artifacts in the image. When using optical zoom be reasonable. Run some experiments in the months before the eclipse by taking pictures of the moon. Check the details and see how blurry or clear they appear. Reduce the zoom level if the image is blurry despite your best efforts to focus.
Practice by taking pictures of the Moon during the various phases. This helps you learn how to use the important controls of the camera in the dark. In other words, you get a better "feel" for the camera.
Recharge your batteries the night before. A back up battery is always recommended. Check your available power before the eclipse starts and make sure there is plenty.
Check your memory card. You don't want to run out just as totality is taking place. Many eclipse chasers elect to use a blank memory card - make sure it is working by putting at least one or two pictures on it before the eclipse.
Make sure your flash is off.
Practice dry runs days if not weeks ahead of time. The full moon makes for an excellent test target.
Selecting a digital camera for eclipse photography
Digital cameras are the standard these days. Although film can produce a finer image of a total solar eclipse, digital cameras have become suitable. The primary differences between a picture of an eclipse taken with film versus a digital camera are the depth of the color, faster light gathering, the frequency of picture taking, and internal reflections/chip overloads.
The key feature to consider when purchasing a digital camera for eclipse photography is the depth of shading the electronic camera supports. The depth of shading is how many levels of a particular color can be stored. Cameras support millions of colors but may not always support the same shade depth. It is this feature that often produces a more vibrant picture in one camera over another. Color depth is often expressed in bits. Each bit provides an order of magnitude more data. An eight bit depth supports 256 color levels compared to one with 12 bits of depth supporting 4096 color shades. The number of theoretical color shades is two raised to the number of bits. Ideally you want as many as possible. Commercial cameras with 14 bits of depth are now becoming more common. These work quite well for total solar eclipse photography.
Compact digital cameras can produce eclipse images but the size of the image will be small when compared to digital cameras that can be attached to larger lenses and telescopes. It is recommended to use the optical zoom feature of a camera only. Digital zoom and other image enhancements are best accomplished at the computer after the event. Compact digital cameras are best for taking pictures of people before and after the eclipse - you can always trade those pictures for eclipse pictures from others.
The faster light gathering and frequency of picture taking when using a digital camera versus a film camera requires some minor adjustments in thinking. To take advantage of the faster picture taking you can set the camera in a burst type mode and turn off all the review features. Where as a film camera has to be advanced (manually or mechanically) a digital camera only needs to move the data from the chip to memory. Some cameras do this faster than others. Professional level cameras achieve this by providing buffers for maximum through put of a few pictures, then a delay, then another burst opportunity. A hidden advantage of digital is that the movement of the image is electrical and does not involve any mechanical items. Thus there is no vibration caused by that action. Another advantage of digital over film is the number of images you can obtain. Film is typically sold in 24 or 36 frame rolls. With a digital camera you can take hundreds of pictures before a new memory card is needed.
Internal reflections of cameras and optics are a problem with all image recording devices, film included. But digital cameras have additional sources of internal reflections that may cause a problem during the very high contrast diamond ring.
Travel Packing for a Solar Eclipse
You will find a lot of information and advice on travel packing from multiple sources. Selecting the right clothes, preparing for the weather, dealing with wrinkles, and other such considerations are a matter of preference and style. When it comes to eclipse chasing the real goal is to get your cameras and optics to the eclipse zone and safely back again. For that I've got a few tips based on my own experiences.
Carry it on: I cannot emphasize enough that you should carry your camera and telescope gear with you. By carrying these items you avoid possible theft, damage, and delays. Tripods are about the only exception because of the size involved. In most cases the optical equipment cannot be replaced or repaired during the eclipse travels - but clothes can. You might have to "go native" until your luggage catches up but at least you can still enjoy (and photograph) the eclipse.
Contingency: The tripod does present a risk when packed. It may not arrive at the destination with you. The best solution is to have a contingency plan. If travelling to an area frequented by tourists you might be able to locate a camera store with a suitable tripod in stock. Otherwise the best insurance is to have a plan in case it does not arrive with you.
Extra batteries: Modern cameras use batteries and you will want to have a spare set on hand. Also, don't forget to carry the charging aparatus with camera equipment that uses rechargable batteries. It can be very frustrating to have dying batteries when you luggage does not appear.
Padding: When I pack my backpack full of camera and lens equipment I toss a change of clothes inside as well. Select the clothes that can get bunched up and survive without wrinkling too bad. Not only is a fresh change of clothes nice to have when travelling longer distances in a short time but it makes for an excellent cushion for the camera optics.
Education: Plan to spend a few minutes explaining the contents of your carry on bag to the security people. Many of them have never really seen a telescope and will be curious about dense metal objects such as counter weights and solid mounts.
Tools: Due to the henious acts of a few you need to pack tools such a screwdrivers and pliers in your luggage and not carry it aboard airplanes these days. I used to carry a couple "all-in-one" type tools with me but now they go in the checked luggage. These days I put a small tool bag together and pack it away. By selecting cheap, light weight, all-in-one, type tools the little bag of tools does not take up much space. And if lost (stolen) it is not difficult to replace. Also, don't forget the universal repair tool - duct tape.
Camera Setup Tips
Type of Picture
What you'll need
Setup
People before and after eclipse
Basic Camera
Normal pictures
People during eclipse
Basic Camera on tripod
(NO FLASH!) Longer exposures
will blur movements of people. Evening exposure setting, 1/60 and more second depending on background and eclipse angle. For strong contrast use the shorter end of the exposures.
Horizon
Basic Camera
(NO FLASH!) Evening exposure
settings, tripod recommended, 1/125 to 1/30 second. Essentially this is a sunset colors picture. Practice by taking pictures of the horizon just after sunset or before sunrise.
Sky colors
Basic Camera
(NO FLASH!) Evening exposure settings,
tripod strongly recommended for longer exposures. Range is 1/125 to 1 second
exposure. Practice by taking pictures of the sky just after sunset or before sunrise.
Planets and corona together
Basic Camera on tripod
(NO FLASH!) Longer exposures of one
or more seconds. Practice setup by taking picture of moon near a bright
star to get a feel for how your camera will respond to such a scene.
All sky picture - showing everything from coronal
streamers to horizon
Wide angle lens (fish eye) or reflector. Tripod
for camera rig.
Using a slow ASA speed use several seconds to capture the depth
of colors and variable brightness. Sky will change continuously between 2nd
and 3rd contacts. Wide angle video (reflection ball?) is best when all automatic settings are turned off. Practice by taking night time pictures during a young or very old moon with a variable horizon brightness (just before sunrise or after sunset).
Partial Phases
Longer lens or telescope with proper solar filter.
Filter density will dictate camera settings.
Practice by taking a picture of the full sun around noon and another set
an hour before sunset. That will be the range of brightness for
the partial phases.
Projections of partial phases
Telescope or binoculars shining on light colored
background, camera.
Normal outdoor pictures. The more contrast and surrounding shadow the better. Unless you are using a telescope for the projection expect the partial eclipse images to be a bit fuzzy and out of focus. A telescope projection will reveal sunspots (if any).
Sunspot occultation
Telescope with solar filter.
See partial phases above. Practice by taking pictures of sunspots with your telescope. You can use either a filter or a projection method to get very nice pictures.
Pinhole camera effects
Regular camera
Keep your eyes open! They appear everywhere! Normal exposure for outdoors. High contrast makes the little projections appear better.
Strange shadows
Regular camera
There are many kinds of strange shadows that
appear near 2nd and 3rd contact. Shadow bands are
the most difficult to photograph, let alone see in the first place. The
ethereal effect of the eclipse is very difficult to catch. When you look closer at the shadows you will notice one side will have a sharp focus while the other side will appear fuzzy.
Diamond ring
Longer lens/ telescope and camera
The diamond ring effect results from a small point of photosphere shining through a valley at the edge of the moon while you can still see the corona. A beautiful diamond ring image can be obtained using the same settings as for the inner or mid corona. The key is the timing.
2nd contact is the most difficult. You must remove your filter, refocus, and then shoot. Be careful not to look too early because that could ruin the rest of the eclipse for you.
3rd contact occurs just a few seconds after the bright red chromosphere appears. You will see a tiny point of white amidst the red. At that point shart shooting images.
Baileys Beads
Longer lens/ Telescope and camera
As multiple points of photosphere shine through valleys along the edge of the moon you will see what was first described by Bailey as a ring of bright pearls. Very fast exposures (1/2000 to 1/1000) will reveal individual points of light. Even though only a tiny portion of the photosphere is visible, it is still very bright and dangerous to look at.
Chromosphere
Telescope and camera
Immediately surrounding the photosphere is the bright red chromosphere seen using hyrdrogen alpha telescopes. The chromosphere details can be photographed using very fast exposures and a telescope/camera. The chromosphere appears just before 3rd contact and just after 2nd contact.
Prominences
Telescope and camera
Prominent bright red spots to the naked eye these resolve into "dancing flames" with a zoom lens or telescope. Fast exposures (1/2000 to 1/1000) are all that are needed in most cases. They are the same brightness as the chromosphere.
Inner corona
Longer lens and camera
As exposure time increases, the prominences
will wash out and more and more of the corona will be visible. The inner corona will show strong details in the polar brushes and the base of streamers.
Outer corona
Zoom lens and camera
Mid range lens of 200mm to 400mm will serve
nicely for this purpose with exposures ranging from 1/2 second and upward.
Coronal streamers
200mm lens and camera
Exposures will range from 1/2 second on up.
Shadow bands
Video camera on tripod
A uniform light colored area is needed for the best
effect. Good luck, it has to do with being at right angle at the right momemt. A fast
video system is needed to capture this effect.
Earthshine
Longer lens and camera telescope.
Long exposure, greatly overexpose corona and
prominences to get a picture of the earthshine on the moon.
Estimating the Expsoure
The following exposure settings for cameras are just estimates. You can use them as a guide to get started. Bracket exposures to either side of the estimate by adding and subtracting exposure times. For example, if the recommendation is for 1/125 of a second take at least three pictures ranging from 1/250 to 1/60 of a second.
My basic plan is to start with a quick set of diamond ring exposures then go progressively longer as the eclipse moves to maximum. As the prominences on the other side begin appearing drop the exposures back to the fastest settings for the chromosphere then increase slightly to catch the 3rd contact diamond ring with some inner corona. But that is just a basic plan - sometimes it works out and sometimes it does not.
An easy way to estimate exposure time (t) in seconds is to square the focal ratio (f) of the camera and divide that by the product of the file speed (ASA) and the brightness of the object (B).
(f * f) = t
(ASA * B)
You already have the film speed (ASA) and focal ratio (f/stop) from your system. The following table provides the estimated brightness factors for various parts of the total solar eclipse.
Prominences, brightest corona (512)
Diamond ring (32)
Inner corona (8)
Outer corona (0.5)
For example, if you have your ASA set at 200 with an f/5 lens system and want to take an image of the inner corona you can estimate the exposure as:
(5 * 5) / (200 * 8) = 25 / 1600 = 1/64 of a second.
Most cameras do not have a 1/64 exposure setting so just use the nearest available setting as the base for the estimation. In this case, 1/60 resulting in a suggested bracket of 1/125 to 1/30 of a second.
Remember: These are just estimates to get you close to a solution.
Exposure Estimations
Use Tab key to move field to field.
Input your lens and camera specifics at left,
results will appear below.
RS = Solar Radii
1No tracking mount exposure limit. 2 Applied to corona and diamond ring. 3 Applied to prominence, chromosphere, and partial exposures. 4 The amount of corona to show for the diamond ring effect is a matter of taste.
Tips for Photographing Partial and Annular Solar Eclipses
Photographing a partial or annular solar eclipse requires some thought. In most circumstances you cannot just point your camera at the Sun and take a picture. The Sun is simply too bright for your camera (and your eyes). The exceptions are when weather presents a thin layer of clouds that act as a solar filter or the Sun is close to the horizon (such as sunset or sunrise). Even then, you must be extra cautious so as not to damage your camera or eyes.
The simplest method is to take pictures of pinhole projections/shadows. Find a tree with leaves or something that has many little holes. Look at the shadow and if you can see bright sunlight then you should be seeing projections of the partial or annular solar eclipse. To take a picture like this just use the automatic or normal daylight settings and a regular lens.
A better, crisper image can be accomplished by taking a picture of a projected view. If you have a telescope or binoculars on a tripod you can set up a projection system.
Taking a picture of the projected image (with some background) is easy. Just set the camera to automatic for daylight or use the light meter for the exposure. Focus on the projected image and take the picture.
Solar filters should be designed specifically for your optics. Making your own solar filter requires a significant note of caution and the use of the proper materials. You should also pay particular attention to how the filter is mounted to the camera optics. A sudden wind gust could be tragic. Click the link for more information about building your own Solar filter mount.
Dedicated solar filters produce images in a variety of colors. The most common are blue and orange. Treat these filters delicately and make sure they remain free of scratches or blemishes. If a layer of the filter is deteriorating, the filter is useless. Solar filters are available for most brand name cameras and lenses. They are only recommended for longer focal length (higher magnification) setups as shorter focal lengths produce only a dot on the image.
Advanced solar filters such as hydrogen-alpha or calcium-k, which are used by astronomers to study various layers of the solar disk, can also be used however they require a bit more expertise. That expertise is best obtained through practice. Because these filters only allow a single wavelength through the image is dimmer and longer exposures are required. As an example, using a Coronado 40mm f/10 hydrogen-alpha telescope with a 2x Barlow lens requires about 1/30 of a second for an exposure of the solar disk and half a second for prominences. To obtain the best images a tracking mount is used. Blur is evident at about one quarter of a second.
Exposure settings and estimates are based on the density of the filter. The exposure calculator supplied online is for a ND5 (Neutral Density) filter. This dark filter only allows a small portion of the light to get through. If you use an ND6 or ND4 filter the settings will be different.
To figure out what works best, practice by photographing sunspots in the days before the eclipse event. If there are no sunspots visible then just try to get the crispest image of the edge of the Sun you can. You might see some faculae or other solar features such as the granulated surface when the exposure setting is best (depends on the type of filter and lens system).
Atmospheric extinction near the horizon will sometimes produce a solar image that does not require a filter. Sunset (or sunrise) images taken without filters can show details of the solar disk. Longer lens lengths are needed (300mm or more) to really get a great image. The problem is the exposure setting. If you have an automatic exposure meter then use a slightly quicker exposure. The meter will be averaging the entire scene and that will overexpose the solar disk.
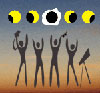
 Search Eclipse Chasers Site
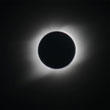 Whether you are an experienced astrophotographer or just happen to have a camera handy, you can obtain interesting and beautiful photographic memories of a total solar eclipse. The key is to be prepared and to have a basic plan. This reference is intended to help you prepare and plan to photograph an eclipse while enjoying the experience at the same time.
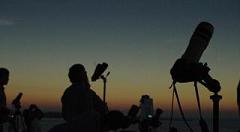 You will hear some eclipse veterans declare that you should not bother to photograph an eclipse. For some that advice works. Sit back and enjoy the visual show - there is a lot to see and experience. Wasting time with a camera will detract from the splendor. However, photographing a solar eclipse is both thrilling and exhilarating. Photographing the eclipse successfully provides a tangible memory that will never fail to bring a chill or a tingle. Even a simple camera will produce a picture that captures the moment.
 This is why most first time eclipse chasers are instructed to forget about taking pictures and just sit back and relax. I know my response to that during my first eclipse was - "yeah right". Perhaps it was because I was a teenager, or because I was then, and am today, an avid astro-photographer. Either way, the result was that I plunged into taking eclipse pictures with little to no information on how to even get started. The purpose of this writing is to introduce the eclipse chaser (both novice and experienced) in what I know about taking solar eclipse photographs. You may already know more about this subject than I do, or spot a mistake in my writings; in which case I'd welcome your input for making this information more complete.
 Using a telescope or telephoto lens requires some practice. While the total eclipse is taking place is not the time to learn about the features of your equipment. Practice by taking pictures of the moon. Lunar photography is both rewarding and challenging. Plus the practice will allow you to check out your gear before learning about a missing component while half a world away from home.
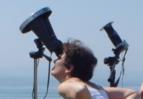

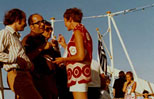
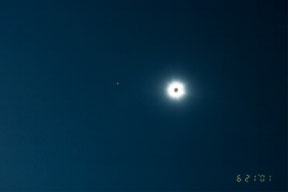
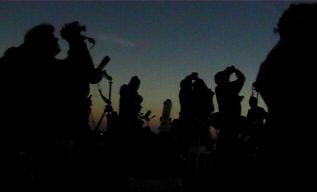
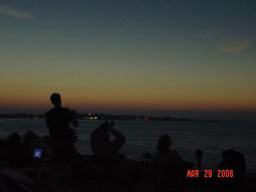
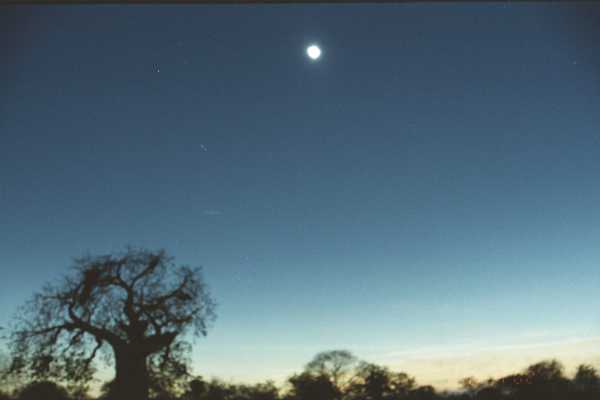
 Chances are you are going to want to use a zoom or telephoto lens to get a closer look. The picture of the crescent moon at right was taken using a 300mm telephoto lens coupled to a standard film camera. A telephoto lens is like having binoculars or a small telescope for your camera. You can get a closer view and see more details.
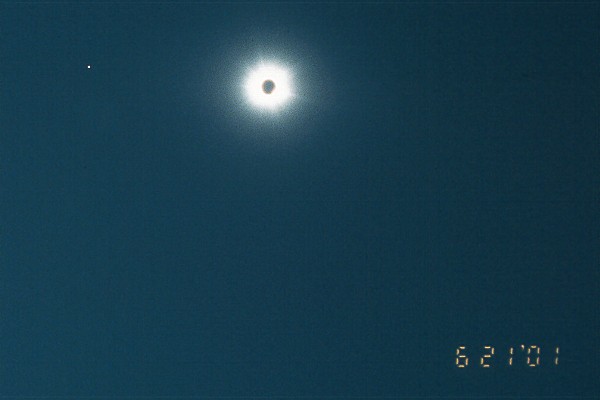

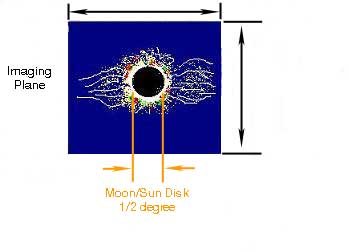
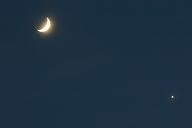

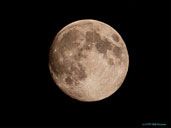

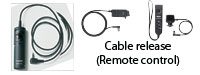

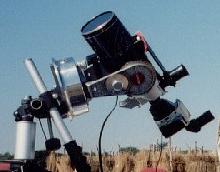
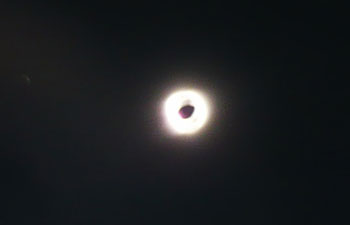

 To obtain a good image of the corona you will need to take multiple images with variable exposure lengths. These images are then stacked and processed later in the computer using a tool like Photoshop.
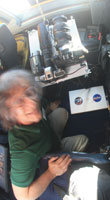
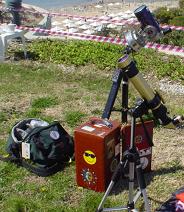 There is nothing that compares with the view of a total solar eclipse through a telescope. It is like the difference you experience of looking at the moon with just your eye and then a telescope. It doesn't really matter what size of telescope you are using - the view is very different. With a telescope the craters and mountain ranges are revealed and the moon takes on a very different appearance. The view of a total solar eclipse through a telescope is much the same. Prominences are amazing and the corona simply fascinating.
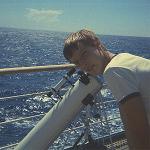 Using my simple rule of thumb, a larger field telescope is one with an aperture of 5" or more. Another way to think of it is a larger telescope cannot be easily carried out to the drive way or yard in one load. Despite the difficulty in transporting a larger telescope, the views and photographs can be very worthwhile. Or so I have heard. I must confess to having never brought anything larger than an f/10 4.25" reflecting telescope. That was for the 1972 and 1973 eclipses viewed from on board ships. The view was excellent using a 1" eyepiece (about 45x). For subsequent eclipses I've used a Questar telescope and binoculars. I can only imagine what it looks like through an eight inch (20cm).
 Larger telescopes tend to have longer effective focal lengths and may not show the entire ring of the moon. They are best suited for looking at the chromosphere, corona streamer details, and prominences. Or you can attempt to see stars behind the corona near the sun. For scientific studies these telescopes are essential. I just can't say that they are recommended for the few minutes you have available under the umbra. My favorite views of the eclipses I've seen have been through smaller telescopes that showed the entire moon and a lot of corona in the same field of view.
 "Light buckets" or very large telescopes are not needed for a total solar eclipse. The corona is very bright and you will not be interested in deep space objects during the eclipse event. I can imagine that very large apertures will diminish the quality of the view and unless you are engaged in scientific studies requiring such optics (such as detecting gravitational effects of starlight near the solar disk - use radio waves and go enjoy the eclipse!) The expense of bringing very large optics along may not be worth it. For the ease of travel and best view, a smaller telescope is the winner. The next best solution is a good pair of binoculars.
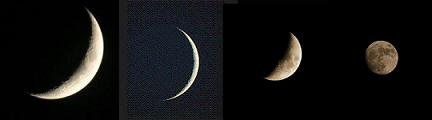
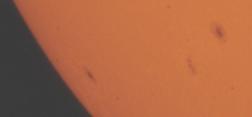 The partial phases of the eclipse can be photographed using a solar filter if you have a longer lens or telescope. The amount of light will lesson during the eclipse requiring changes to the exposure setting. You can find the proper exposure ranges for your configuration by taking a range of solar pictures. Vary the time from noon to near sunset or with variable cloudiness. If you have a telescope, the right exposure should also show sunspots.
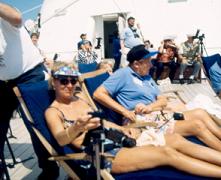 For most the best thing to do when observing an eclipse from a moving ship is to simply sit back and relax, enjoy the view with binoculars, and the fantastic experience of cruising! Because there is plenty of room most people remain seated or in one place making collisions and so forth rare - but they have been known to happen. If you are on the ship with friends and family ask them to sit in places that help block others from obscuring your picture or walking in front of you.
 In my experience this is the most challenging type of solar eclipse photography I’ve ever attempted. Airborn based total solar eclipse photography imposes numerous restrictions and limitations. For starters there is a restriction on how much equipment you can carry with you, limited space for the equipment, limited window size, and unpredictable vibration/movement during the eclipse run.
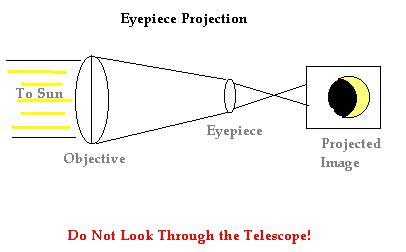
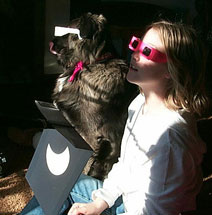
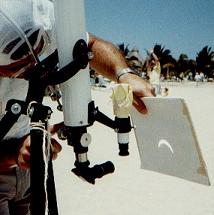
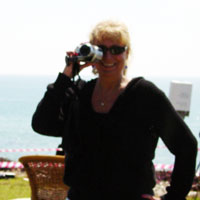 My own experience with video recording an eclipse is rather limited. However, Denise has used a handheld camcorder at several eclipses to record the event as far back as 1991. The most precious component has always been the audio where you can hear the reactions of everyone around us. Over the years, as camcorders have gotten better, she has continued to use it in a handheld fashion to get some wonderful video of the eclipse, the environment, chasers, and of course the audio.
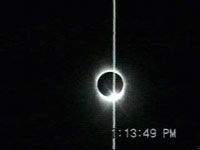
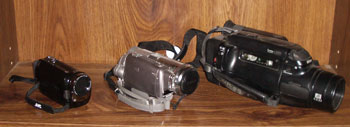 Three generations of camcorders. Left to Right: 2009 JVC Everio 1920x1080 HD, 2005 Panasonic 3CCD GS-250, 1994 Nikon VN-870. Today's cell phone cameras are smaller and are capable of video recording however the tiny lens makes them all but useless in terms of getting a good video of the eclipse.